This is a collection of interesting logos from all over Printables.com. They are of all sorts, single-color, multi-color, large, small. Use them as inspiration for what can be done or download and print one out for yourself.
If you have a logo you’d like to learn to model into a 3D printable file, I’d suggest Inkscape and OpenSCAD as reasonable, free, open-source tools that can help you do that.
If you’d like a logo turned into a 3D printable file or want your logo 3D printed, send us an inquiry with the specifics.
Recently we’ve worked on several projects to re-create hard-to-get classic car parts, exact-fit custom parts for restorations, and custom adapters.
The first featured part that we designed was a custom fit cluster plate for the center dash/console for a 60’s era resto-mod Camaro project. The owner had two new gauges they wanted to mount where the radio fit, so they provided pictures, measurements of the dash opening, the gauges themselves, and a hand sketch to give us an starting point for their desired solution. We iterated several times with various prototype solutions to do test fits, got feedback, and adjusted the angles of the two gauges to the customer’s desires.
Our second project was to adapt a MK6 VW emblem to the trunk lid of a MK5 VW. The newer VW emblem has a subtle body curve to the mounting surface while the inset badge mounting location on the car is flat. We carefully measured, calculated, and designed a slim adapter plate that fit both the car surface on one side and the curve on the back of the badge perfectly. A couple carefully-applied 3M emblem adhesive strips on both sides of the adapter firmly attached the emblem. A jig was designed to fit in and center on the inset location on the car to assure the emblem and adapter were exactly centered onto the car. A recent check showed that the adapter is still in place, surviving hot Alabama summers, and performing well 10 years after it was installed.
*If you are removing stock emblems or trying to clean up the remaining adhesive residue, use 3M 03618 Auto Adhesive Remover.
The most recent project in this genre we’ve tackled was to duplicate a hard-to-find mid-1960s Dodge trim clips for a customer’s restoration project.
There are a couple things to take into consideration if you are attempting this yourself:
If you are printing parts for cars, you probably do not want to make them out of PLA. It will not withstand the hottest outdoor temperatures of most locations and definitely will soften and deform at the internal temperatures that cars will develop on hot days. Its glass transition temperature is 60C/140F at which point it will start to droop and warp, ruining the part.
PET-G might be a good midpoint between PLA (cheap, easy to print) and ABS (more expensive, higher temperature tolerance, difficult to print.) PET-G has higher temperature (glass transition is 85C/185F), prints easily, doesn’t give off toxic fumes and is affordable.
for temperature stability, the best material to make car parts out of is probably ABS. The glass transition temperature for ABS is 105C/221F, which, while not indestructible, will stand up to most interior and exterior temperatures a car will experience (engine bay and exhaust temperatures will go much higher than that.) ABS does need proper ventilation while printing as it gives off toxic fumes while it is printing.
consider UV resilience on exterior parts, flexibility/rigidity, impact resistance, vibration dampening and other plastic traits in your design.
we do not design parts that are directly safety-related, mechanical in nature, or that work around engine bay or exhaust heat. If you are working with extremely high temperatures, plastic is not the material you are looking for.
If you are looking to have a rare part duplicated or a custom part designed please feel free to reach out to us with your requirements for a quotation. We’d be glad to design and draft your part and can print your parts as well. We can also do print-on-demand if you already have a design or piece you need printed.
Today Prusa made their latest alpha release of PrusaSlicer available on github: 2.6.0-alpha2. (Make sure you understand what alpha testing is before downloading/using this software. An alpha or release of a software package intends to do something particular, and mostly does so, yet isn’t guaranteed to do so fully. You are testing out an early version of this software, if you find a bug, report it.)
There are many game-changing features in this release, but in particular, this post provides step-by-step instructions on how to get the “auto downloading from printables.com directly into PrusaSlicer software”.
Enable “Show PrusaSlicer button” in your profile while logged into printables.com. Click the avatar icon (upper right corner), then chose the first line item (your user name), then scroll down next to the bold title “Info“, and click on “Edit your profile link”. When the modal window appears, scroll down to the checkboxes section and enable the checkbox for “Show PrusaSlicer button”, then click “Save” at the top of the window.
Enable download option in PrusaSlicer software. In the menu, select Configuration -> Preferences (or Ctrl-P), then select the Other tab. Click the checkbox to “Allow downloads from Printables.com”, then choose “OK”.
These changes should make it so you see the the PrusaSlicer icon next to the download button while viewing a model’s “Files” list.
Select the PrusaSlicer icon next to the file you want to test, confirm (twice) that you want to allow the download integration, and everything should be working.
I’ve tested this on a Windows 10 PC using Chrome, Firefox, and Edge successfully with PrusaSlicer 2.6.0-alpha2.
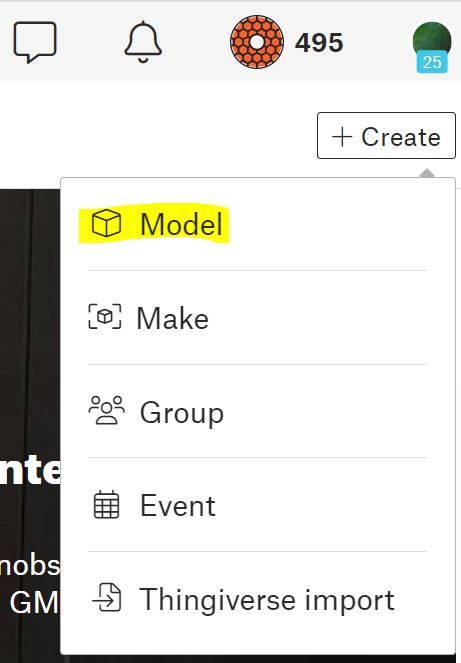
Login to Printables with your username and password. In the upper-right hand side of the screen, click the “+ Create” button (highlighted in yellow, below).
Select “Model” (in yellow, below) to upload a design that you have made or modified.
The minimum information that you will need to provide:
A 3D model file of your design (.stl, .3mf, .step, sl1s, .stp, .amf, .obj)
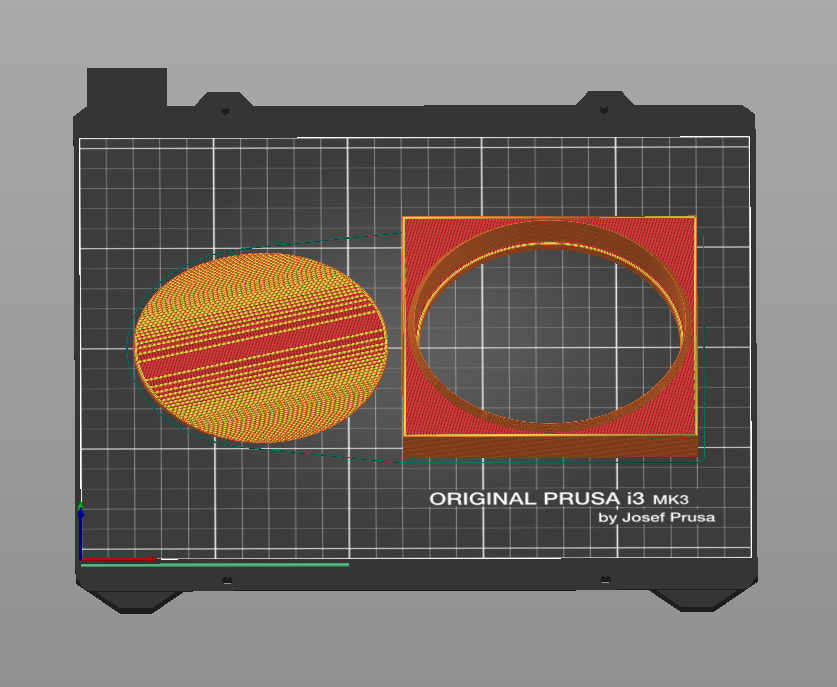
A picture of your model (.jpg, .gif, .png). This should preferably be a photo of the model printed out if possible, but a screenshot of a preview or render also seems to be acceptable.
A name for your model
A short summary of your model
A category your model should be listed in (selected from a provided list
Which license you wish to publish your model under
Enter and upload the required information and you are ready to publish your model for all to see.
If you aren’t ready to publish yet, leave the slider on ‘Draft’ and press the “SAVE DRAFT” button to save your draft for later use. When you are ready to publish your design publicly, click the Draft/Publish slider over to ‘Publish’ and then press the “PUBLISH NOW”.
Keep in mind that publishing is not a final, permanent decision. You can continue to edit your model and all fields about your model. If you decide there was a mistake or you want to retract your publish, simply slide the slider back to ‘Draft’ and press the “SAVE DRAFT” button to make it private again.
Additional fields
Above we addressed the minimal, required fields to publish your design to printables.com. There are a number of other optional fields you should consider completing to help the site and other users find your model more easily, categorize your model, or use your model more effectively. These include:
Additional Tags
linking Remix files (reference the original files)
a detailed Description
any other supporting files (.txt, .pdf (instructions))
Print files (.gcode, .sl1)
You can also re-arrange your photographs that you uploaded and choose which one will be used as a cover photo (‘set as cover’) for your object in the 3D Models index on printables.com.